Eugène Bozza’s Aria is a beautiful piece that is on the Trinity College Exam Grade 7 syllabus. Whilst not too technically demanding, there are some challenges in this piece, which I will address below. I will also give some ideas on phrasing and some exercises to get your flute singing!
Breathing
The phrases in this piece are demanding for the breathing. For some breathing tips, have a look at my previous blog “Can you play it one breath?”
The phrases seem to go on forever! Indeed, there isn’t a single rest in the piece, except for the 4 bars at the beginning. Use two of these four bars to blow out and then the remaining two bars to breathe in through the nose.
There are some natural breathing places in the piece, but Bozza doesn’t give us a lot of time to take them (Thanks, Bozza!). Practising quick breaths with varying note values is a good exercise for this. For example, one could try the following:
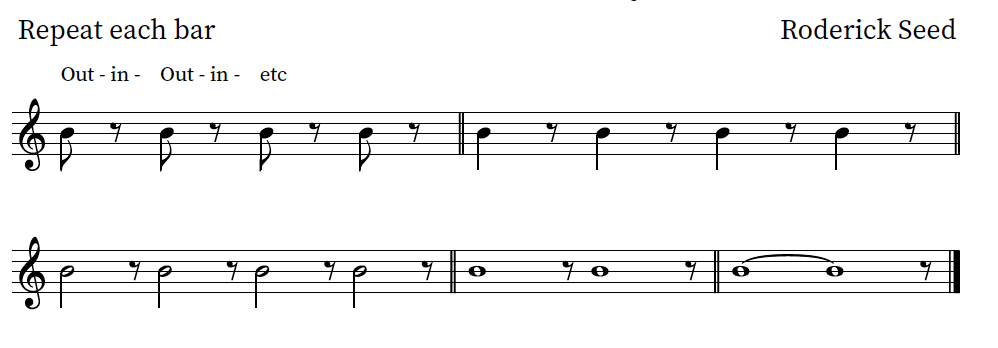
With this exercise, focus on how you blow out and allow the air to come back by itself. In other words, don’t try to force the air in. Much like a dog panting, the air exchanges freely. You can adjust this exercise by making the rests slightly longer or shorter, depending on what you feel comfortable with.
Doing the first bar of this exercise on repeat is also great for waking up the airstream and creating a lively sound. I suggest not using the tongue, but simply blowing (“ha”-“ha”).
Phrasing
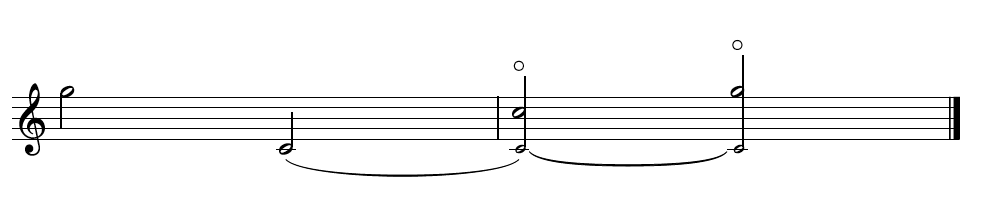
A great way to understand the structure of the phrases is to find the outline or skeleton. So, below is a simple skeleton of the first section with my suggested breathing points (marked “V”) where the music naturally comes to rest. Notice, however, that the phrases continue over the breath. The only place where the music stops is at the very end! This is why we need to practice quick and subtle breaths. Be careful not to enter a phrase after breathing with a louder attack, which will disrupt the shape of the phrase. Instead, try to match the dynamic of the end of the last note before breathing with the start of the next note. There’s a balance that needs to be found of sustaining the phrase (not allowing it to die away too much before breathing) and then entering with a soft attack.
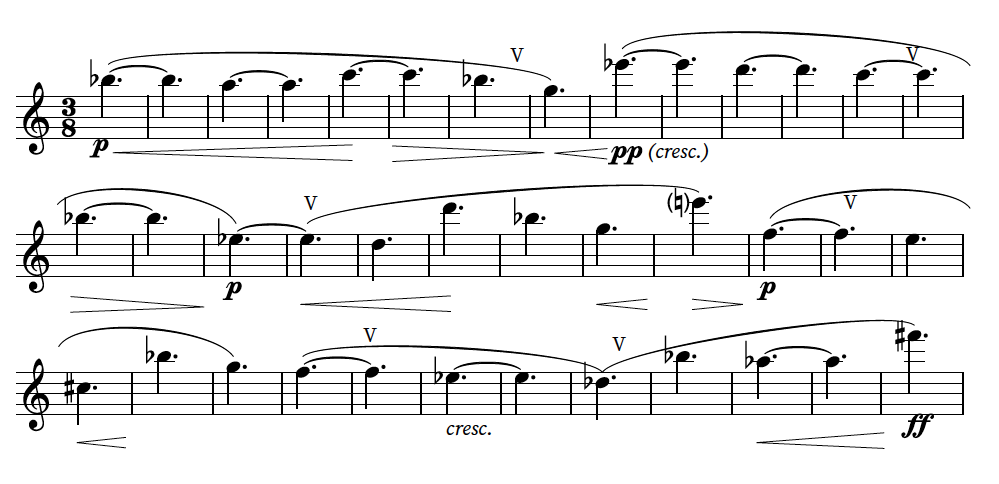
I have also added some suggested dynamics in addition to the ones Bozza writes to help shape the phrases.
After practising the simple skeleton, try adding a few more notes back and finally play it with all the notes, not allowing the changes of fingering to disrupt the legato lines.
Tone exercises
Harmonics
Practice the outline on harmonics for finding the airspeed and direction you need for each note. Harmonics are your best teachers in this way, because as soon as your airspeed drops, the pitch will drop to a lower harmonic. Similarly, if you are blowing with a pinched embouchure or there is tension in your throat, you may find that the harmonics shoot up to a higher pitched harmonic, which tells you that you need to let go of that unnecessary tension. It also trains the jaw/lower lip in finding the correct angles for each note.
For notes G2 and above, you can play the 3rd harmonic of the note fingered a 12th below. E.g. For G2, you would finger low C. For notes lower than G, you can just finger the note an octave below.
Sing and play the melody
Sing and play the melody to find more resonance and freedom in the airstream. You can also just sing the melody and this will also give you ideas for phrasing and how to support the phrases. Feel where your voice and sound resonate in your body and try to find that same resonance when you play. Tension in the muscles of your body will make it very difficult to play with true resonance. See my blog on finding resonance for more tips.
Type of sound
The Aria goes through different keys and it is good to practice all the colours that you want to create. For example, a thrilling sound for when it reaches the top F sharp, contrasted with the whispery ppp melody towards the end. Think about the vowel shape inside the mouth (“ah” for more depth and richness, or “oo” for something more gentle and soft), combined with the type of vibrato you use (fast/slow, wide/shallow, none at all, etc). This melody is a great one to practice all of your expressive tools. Try playing through the melody and only change one tool at a time. For example:
- Keep the dynamic and colour the same, but only change the vibrato.
- Keep the colour and vibrato the same, but only change the dynamic.
- Keep the dynamic and vibrato and same, but only change the colour.
- Combine everything.
See if you can show the direction and shape of the phrases clearly, but with only one expressive tool. When you combine them, you will find the phrases come to life!
I hope this gives you some ideas for this beautiful piece.
Thanks for reading and Happy Fluting!